Handling Data Importing Data & Models
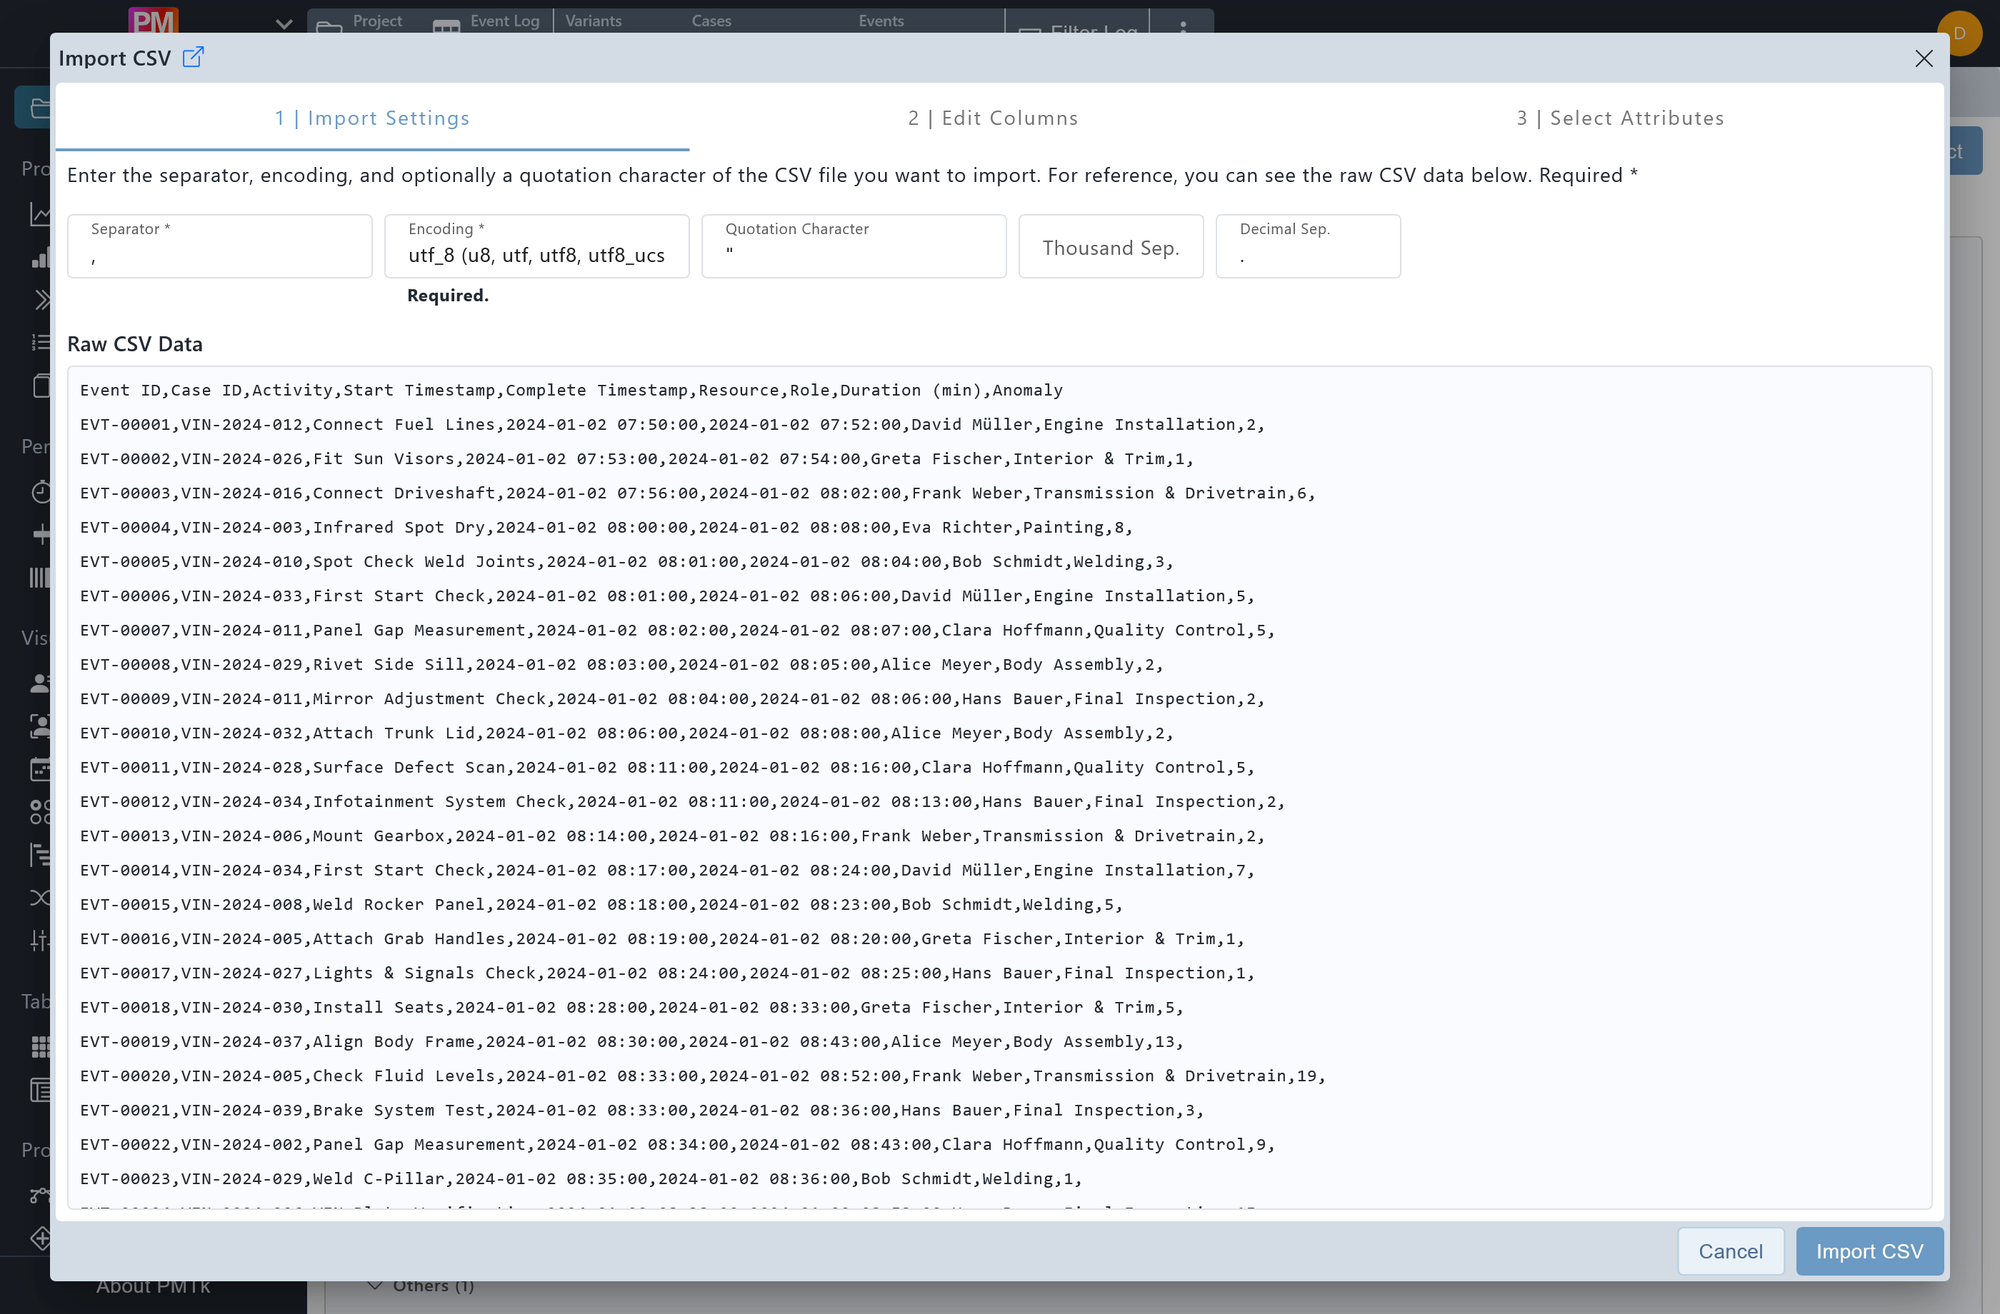
Screenshot shows the Import Settings tab (step 1 of 3) of the CSV Import dialog. The detected separator (,), encoding (utf_8), and quotation character (") are pre-filled. The raw CSV data is shown below for reference.
PMTk supports importing event logs in .csv and .xes format, and process models in .bpmn format. Imports are initiated from the Workspace by clicking on a project row or by dragging and dropping a file onto a project.
If your data lives in a relational database or an SAP system, a Connector offers an alternative: connect to the source and fetch the data directly, importing the result using the same dialog described below. Connectors also support scheduled re-runs to keep the event log automatically up to date.
XES and BPMN Imports
.xes event logs and .bpmn process models follow established open standards. PMTk imports them directly without any additional configuration steps (i.e., no dialog is shown). The resulting artefact (Event Log or BPMN Model) is added to the project immediately.
CSV Import
Importing a .csv file opens a three-step import dialog. PMTk attempts to infer the file's separator, encoding, and quotation character automatically. If inference succeeds, the dialog opens directly on step 2. If inference fails, the dialog opens on step 1 and the settings must be entered manually.
Depending on the size of the event log, the dialog may take a moment to open as the data is read first.
Step 1: Import Settings
The first tab configures how the raw CSV file is read. The raw CSV data is displayed below the settings fields for reference.
| Field | Description |
|---|---|
| Separator (required) | The character delimiting individual values in each row, e.g. , or ;. |
| Encoding (required) | The character encoding of the file, e.g. utf_8. |
| Quotation Character (optional) | The character used to wrap quoted field values, e.g. ". |
| Thousand Sep. | The thousands separator used in numeric values, e.g. , or .. |
| Decimal Sep. | The decimal separator used in numeric values, e.g. . or ,. |
Once the settings are correct, click Import CSV to proceed to step 2.

Screenshot shows the Edit Columns tab (step 2 of 3). The Complete Timestamp column is expanded, showing its inferred data type (Date + Time), timestamp format (%Y-%m-%d %H:%M:%S), and timezone (Not Specified). A success message at the bottom confirms that the current configuration has been validated.
Step 2: Edit Columns
The second tab shows all detected columns as a table preview and lets you adjust how each column will be imported. Every change is validated automatically, with feedback shown below the table.
For each column, the column header shows the detected data type and provides two icons:
- marks the column for removal. Removed columns are excluded from the imported event log entirely.
- opens the column settings panel, where you can:
- Change the Data Type: Text (String), Numeric, or Date + Time.
- For Date + Time columns: set the Timestamp Format using strftime notation (e.g.
%Y-%m-%d %H:%M:%S, click for more examples).
The Separator Settings bar at the bottom of the dialog lets you revisit the Thousand Sep. and Decimal Sep. from step 1 without going back. It also exposes a Timestamp Timezone field: when set, PMTk interprets all timestamps in the log as being recorded in that timezone; if left unset, UTC is assumed and PMTk continues to work as intended. See Appearance Settings for details on how timezones are handled in PMTk. Click Continue to proceed to step 3.
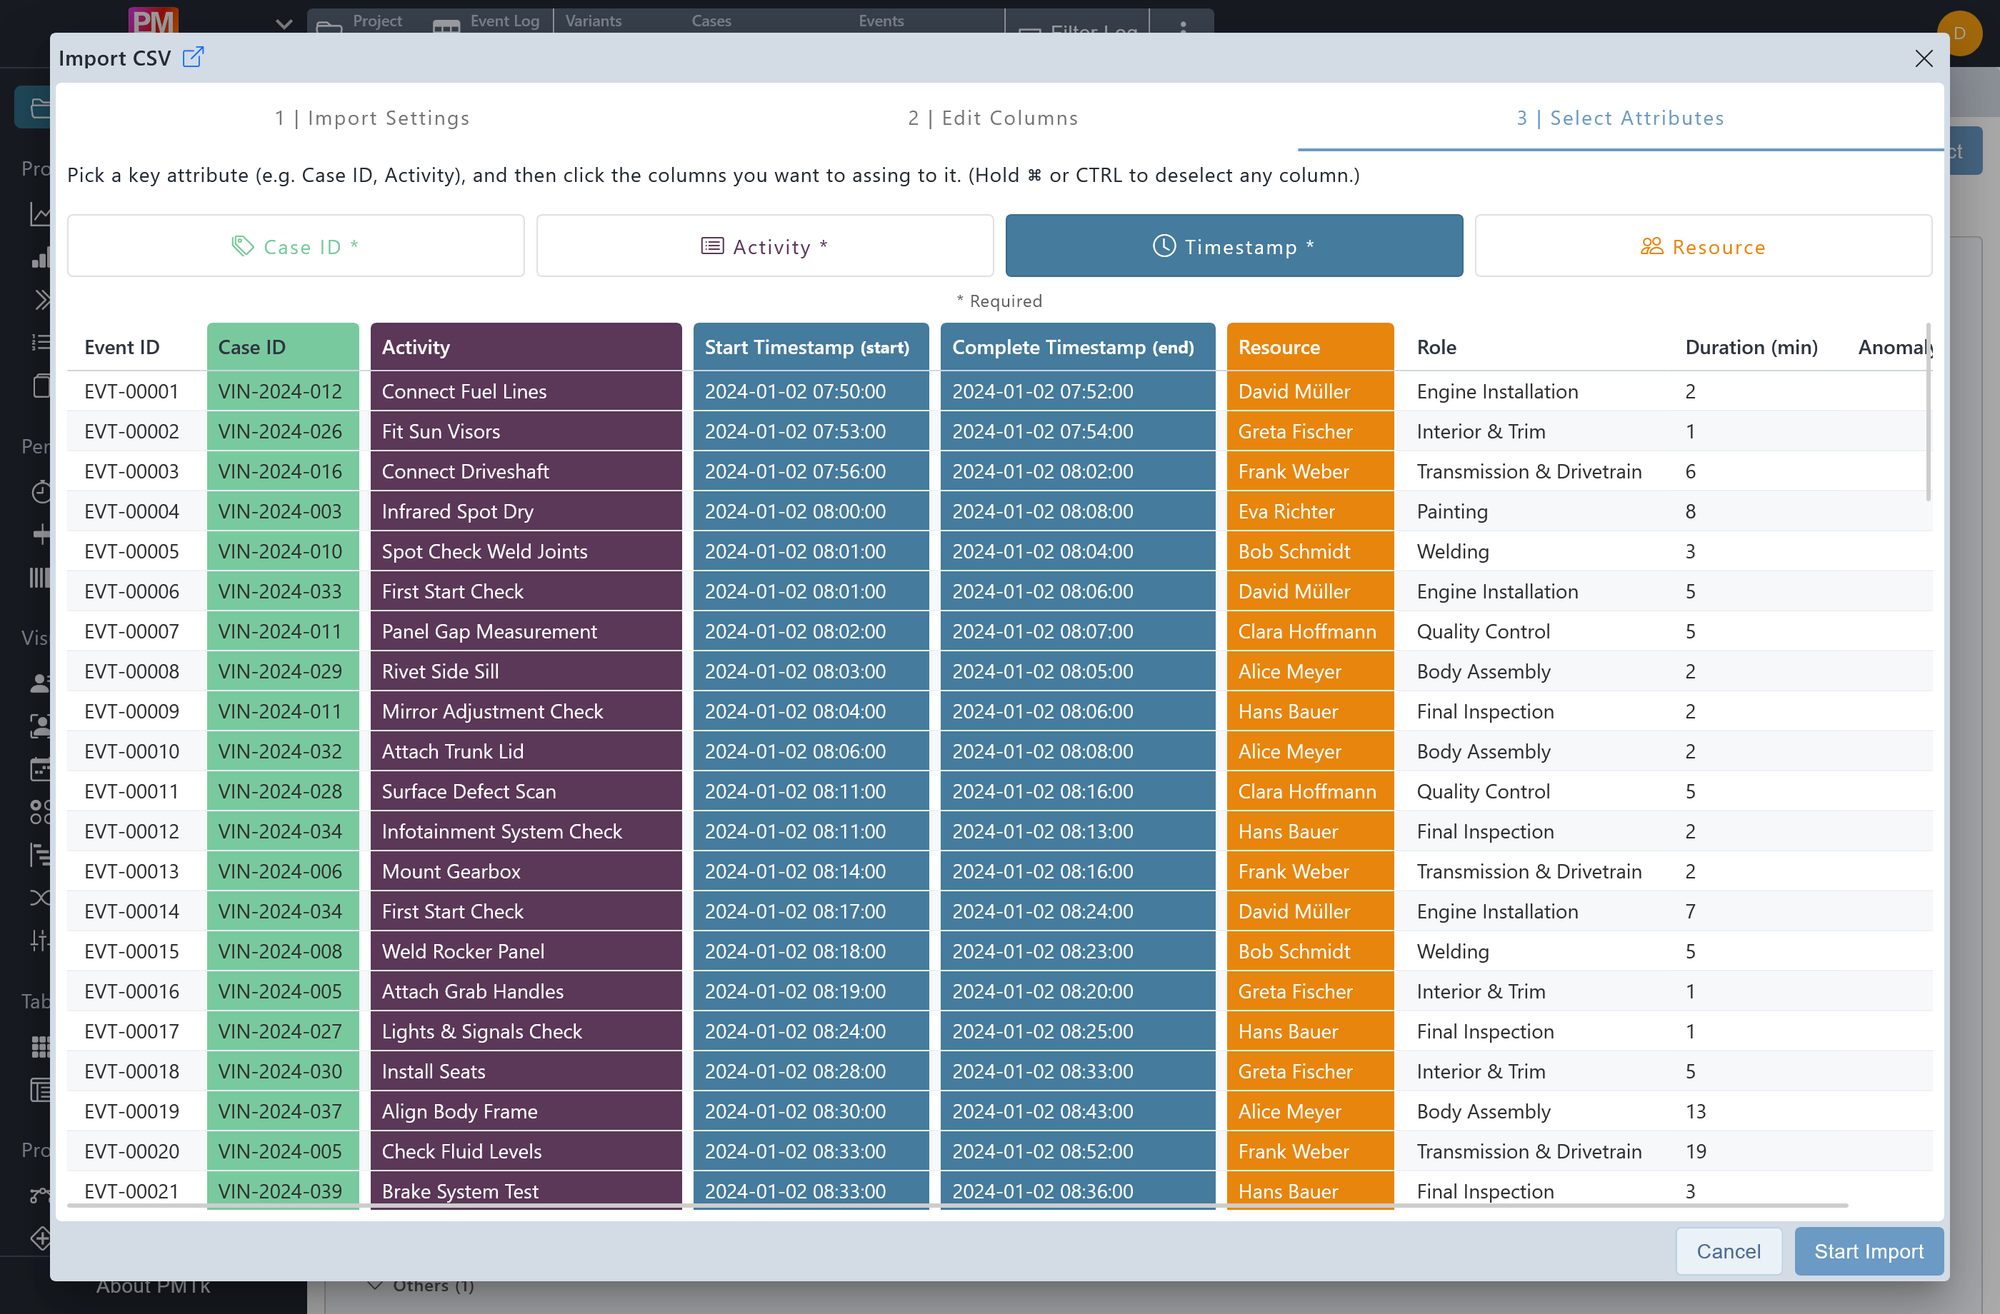
Screenshot shows the Select Attributes tab (step 3 of 3). Case ID (green), Activity (purple), Timestamp (blue / two columns for start and end), and Resource (orange) have been assigned to their respective columns.
Step 3: Select Attributes
The third tab maps the imported columns to the four process-mining roles that PMTk requires. Click one of the four role buttons at the top to make it active, then click the columns in the table below to assign them to that role. Assigned columns are colour-coded by their role. Hold ⌘ or Ctrl and click an already-selected column to deselect it.
| Role | Required | Selection rules |
|---|---|---|
| Case ID | Yes | Any number of columns can be selected. If more than one column is chosen, their values are concatenated to form a single case identifier. |
| Activity | Yes | Any number of columns can be selected. If more than one column is chosen, their values are concatenated to form a single activity label. |
| Timestamp | Yes | A completion timestamp is always required (one column). Selecting a second column introduces start timestamps: the two columns are labelled (start) and (end), representing the start and completion of each activity. More than two columns are not permitted. |
| Resource | No | At most one column can be selected. |
Click Start Import to finalize the import. The event log is added as an Event Log artefact in the active project in the Workspace.
Attributes PMTk Adds Automatically
In addition to the columns you import, PMTk automatically adds a set of derived attributes to the event log, available for use in filters, visualizations, and other components alongside your own data. See PMTk Attributes for the full list.
